Building with Local Language Models on Windows 365
Microsoft recently announced that developers can now run select local language models directly on Windows 365 Cloud PCs. The announcement was made during Build 2026 in the Made for…
Microsoft recently announced that developers can now run select local language models directly on Windows 365 Cloud PCs. The announcement was made during Build 2026 in the Made for Developers and Agents: Windows 365 at Build 2026 blog, alongside new guidance on the relative performance of Windows 365 Cloud PCs for running local language models.
I wanted to understand what the experience actually looked like in practice. So, I provisioned a 16 vCPU Windows 365 Enterprise Cloud PC using the new Developer Configuration gallery image and spent some time seeing how practical it really is to build and test AI-powered applications using local language models on a Cloud PC.
Why does this matter?
Now, I’ll be the first to admit, I’m not a software developer. My day job revolves around Windows 365, Intune and modern endpoint management rather than building applications. However, I do spend a lot of time designing environments that support developer personas, whether that’s developer workstations, Windows 365 Cloud PCs or modern endpoint strategies that enable software development.
Over the last year, I’ve also spent much more time working with tools such as GitHub Copilot, Codex, Cursor and Claude Code. Using them across real projects has made me increasingly curious about the infrastructure underneath these experiences, how those applications interact with language models and where local inference might fit.
That curiosity led me to explore Microsoft’s latest developer capabilities hands-on and see how practical they really are.
One of the biggest decisions when building AI-powered applications is deciding where your models should run.
For many developers, Microsoft Foundry is the obvious choice. It provides managed access to powerful foundation models, enterprise governance, scalability and production-ready APIs.
Not every stage of development needs cloud-hosted inference though.
Sometimes you just want to prototype an idea, experiment with prompts, debug an application or test a new feature without standing up backend infrastructure first.
Running a model locally also brings some real advantages. There are no per-token inference costs, no cloud-hosted AI services to provision and, depending on your scenario, no requirement to send potentially sensitive prompts or data outside the device. For many development and testing scenarios, that's exactly what you want.
Microsoft Foundry Local is designed for those moments. It provides a consistent local inference runtime that allows developers to build and test applications against locally running language models using familiar OpenAI-compatible APIs.
Some of the key benefits include:
- Keeping sensitive text, images, audio or other data on the local device.
- Working in low-connectivity or completely offline environments.
- Reducing cloud inference costs while prototyping and testing.
- Delivering lower latency responses for real-time interactions.
Running that local runtime on a dedicated Windows 365 Cloud PC makes the scenario even more interesting. Instead of filling your primary device with preview tooling, SDKs and local models, you get a clean, isolated and repeatable development environment that can be provisioned in minutes, rebuilt whenever you need it and accessed securely from almost anywhere.
The next question was... how easy is it to actually get up and running?
Starting with the new Developer Configuration image
With the recent announcement that Microsoft Dev Box is coming together with Windows 365, that question feels more relevant than ever. While Dev Box has always been Microsoft's purpose-built developer platform, Windows 365 is continuing to gain developer-focused capabilities, making it increasingly attractive for organisations that want a consistent cloud endpoint strategy across both knowledge workers and developers.
Rather than beginning with a standard Windows installation, I selected Microsoft's new Developer Configuration gallery image for Windows 365.
This was one of the first things I noticed.
Instead of spending the first hour installing development tools, most of the essentials were already available, including:
- Visual Studio Code
- PowerShell 7
- Git
- Python
- Node.js
- Azure CLI
- WSL Ubuntu
- GitHub tooling
- Developer-focused VS Code extensions
For anyone provisioning development environments regularly, this dramatically reduces the time between first sign-in and writing code.
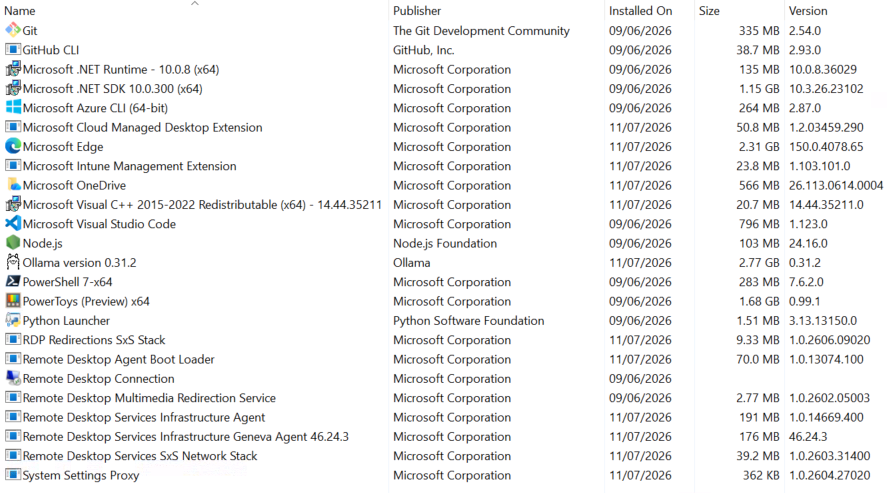
Developer tooling included with the Windows 365 Developer Configuration image.
⚠️ At the time of writing, the Developer Configuration gallery image is available as a public preview and is not intended for production workloads. Microsoft also notes that customers are responsible for managing and maintaining the preinstalled third-party applications, including applying security updates and ensuring compliance. Because these applications aren't currently manageable through Intune as packaged apps, organisations that require full Intune application lifecycle management should uninstall the preinstalled versions and redeploy them through Intune. Finally, this image isn't supported on 2 vCPU or GPU Cloud PC licences, as those configurations don't support nested virtualisation.
Installing Foundry Local
Installing Microsoft Foundry Local was refreshingly straightforward. A simple Winget command installed the runtime, and downloading my first model only took a few minutes.
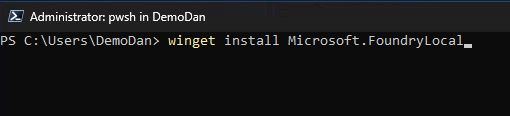
Installing Microsoft Foundry Local through WinGet.
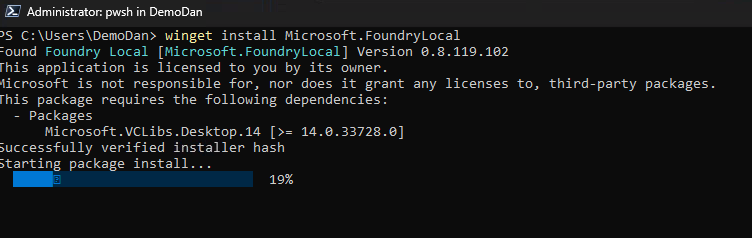
For these initial tests I chose Phi-4 Mini Reasoning, Microsoft's recommended CPU-friendly model for development scenarios. Within a short space of time I was already interacting with a locally running language model on my Cloud PC.
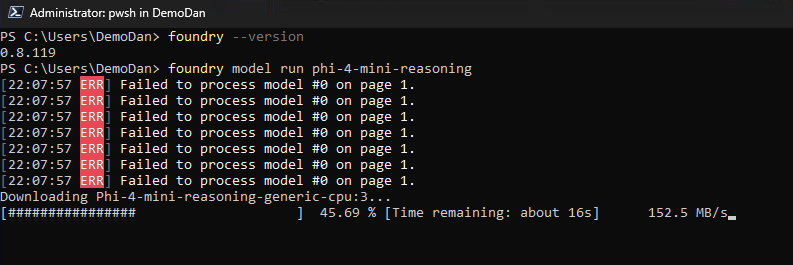
Foundry Local selecting and downloading the CPU-optimised Phi-4 Mini Reasoning model.
Before attempting to build anything, I wanted to prove the fundamentals. My first milestone was simply getting the model running locally and responding to prompts. Once I reached the interactive prompt, I knew the runtime, model and development environment were all working together successfully.
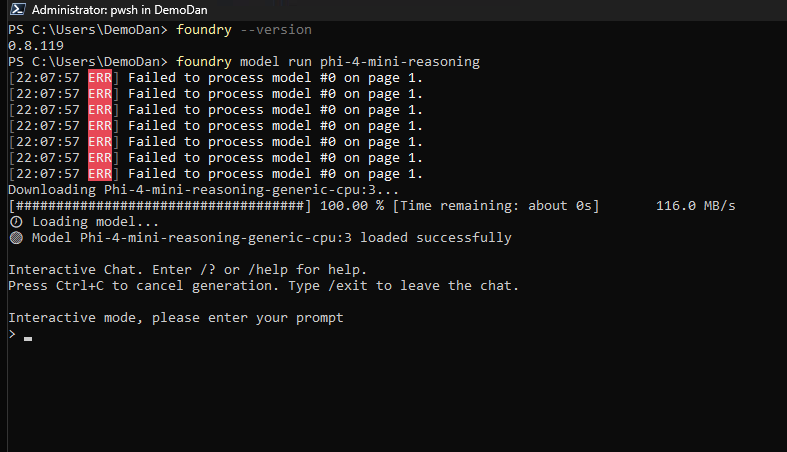
Phi-4 Mini Reasoning loaded and ready for local inference.
With the first model running successfully, I used the Foundry Local catalogue to see what other options were available. It showed a much broader mix of chat, coding, multimodal and speech models, while also making it clear that not every model offered a CPU-optimised variant suitable for this Cloud PC.
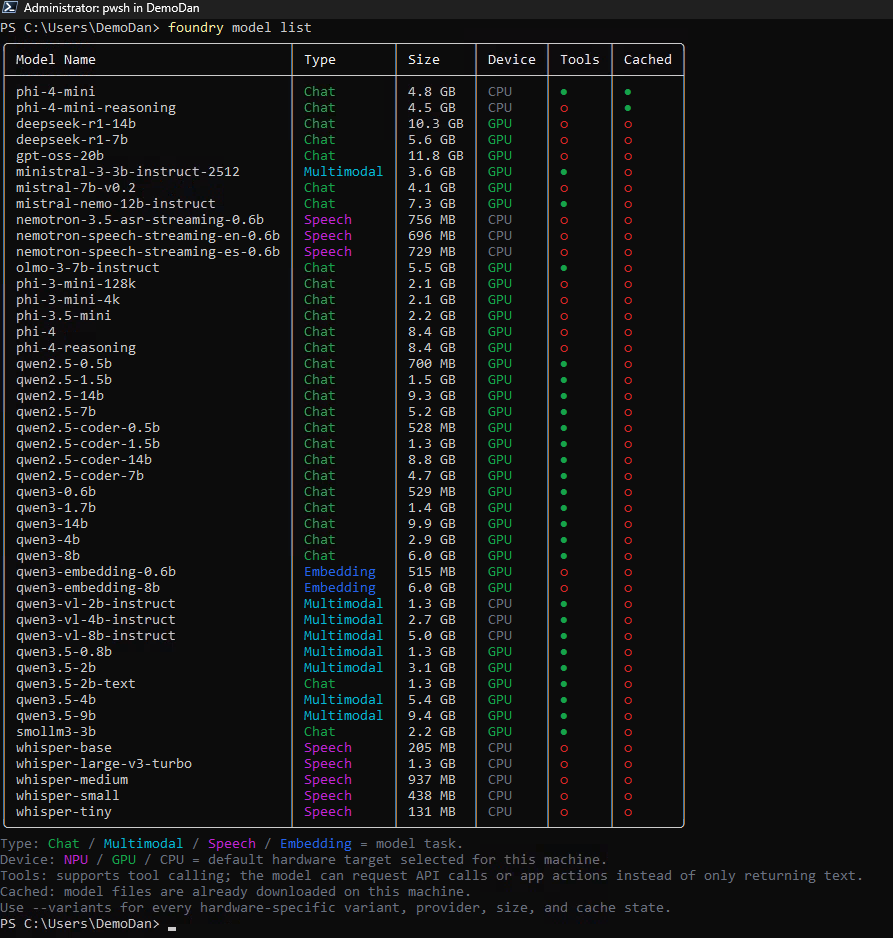
Reviewing the Foundry Local model catalogue and the hardware options available for each model.
Moving from testing to building
At this point, I had successfully installed Microsoft Foundry Local, downloaded a CPU-optimised version of Phi-4 Mini Reasoning and confirmed that the model could run directly on my Windows 365 Cloud PC.
With that in mind, I moved into Visual Studio Code and used GitHub Copilot to help me build a small application that could send local content to the model running on the Cloud PC. A few cloud-hosted Copilot tokens were required along the way, proving even local AI sometimes needs a little help from the cloud.
Building my first application
The first step was to build a simple console application that could communicate with the locally running model. Rather than writing everything from scratch, I used GitHub Copilot in Agent mode to help plan, build and troubleshoot the application. My focus wasn't on producing production-ready code. It was about understanding how an application interacts with Microsoft Foundry Local.
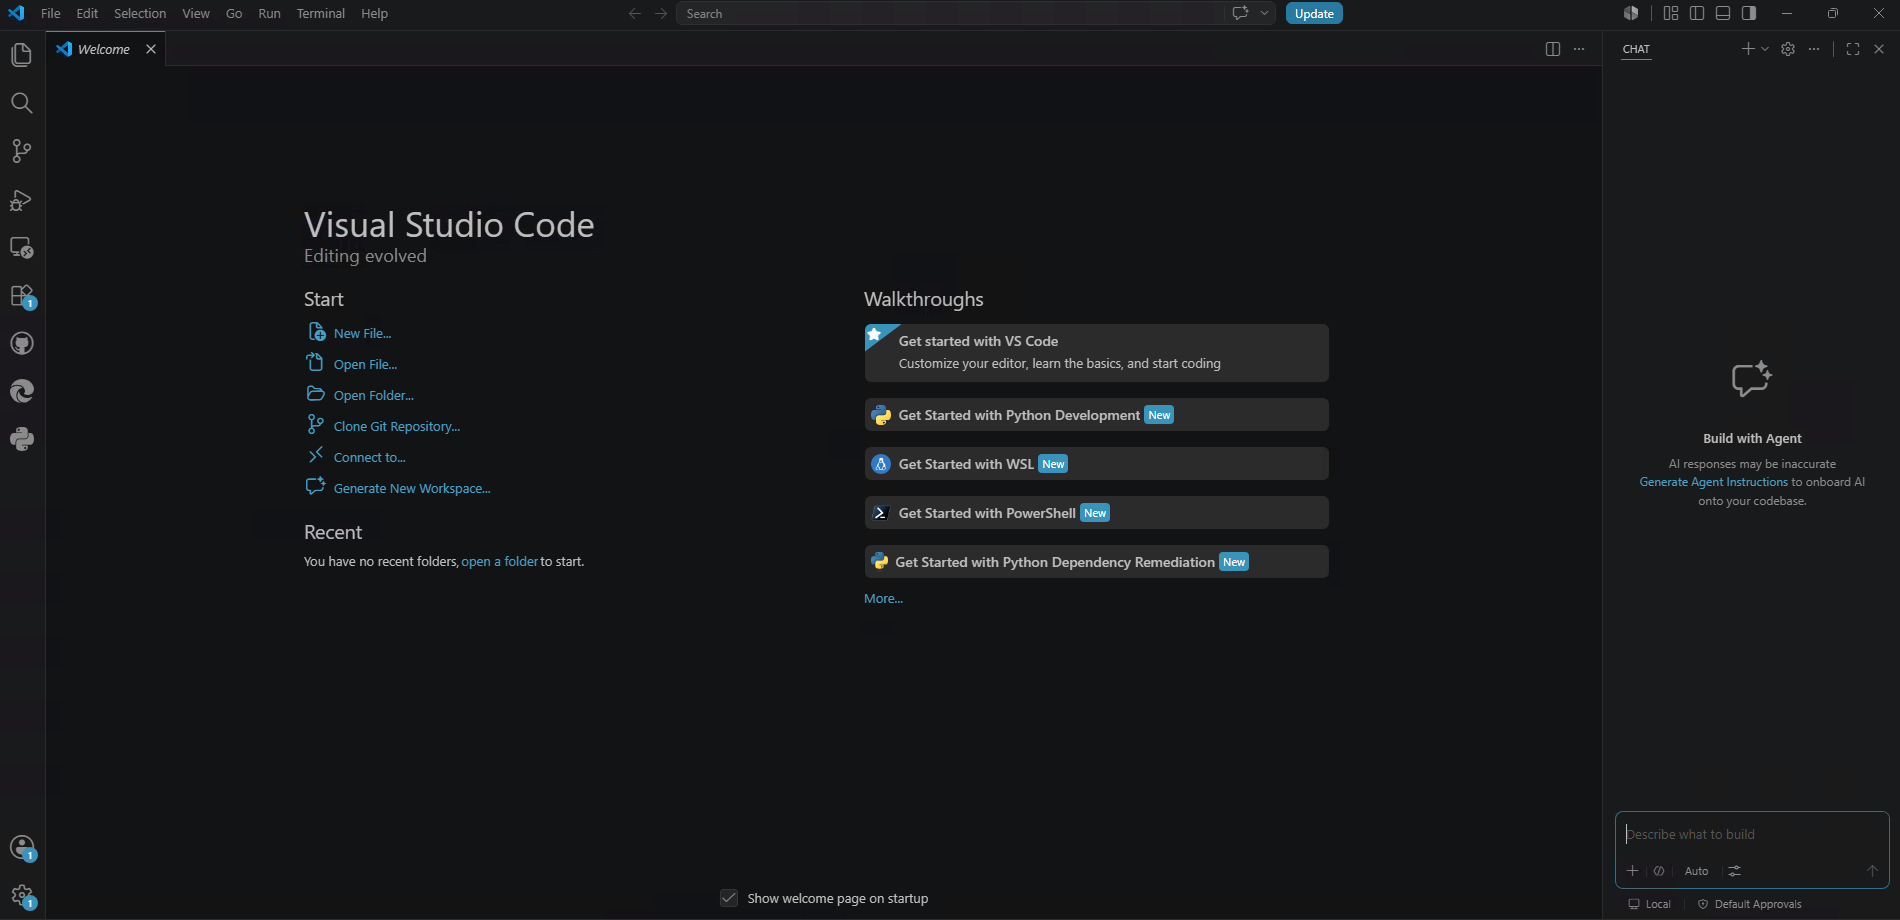
Starting the application project in Visual Studio Code.
I created a dedicated project folder to keep the application files, dependencies and documentation together as a simple, self-contained example.
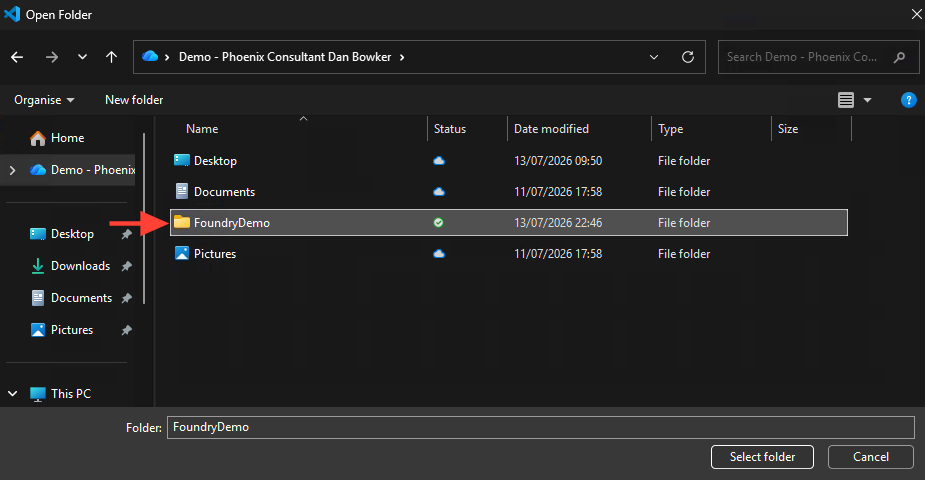
Creating a dedicated workspace for the Foundry Local application
I gave Copilot clear boundaries before allowing it to create anything. The objective was a small teaching example, not a web application, agent, database or production-ready architecture.
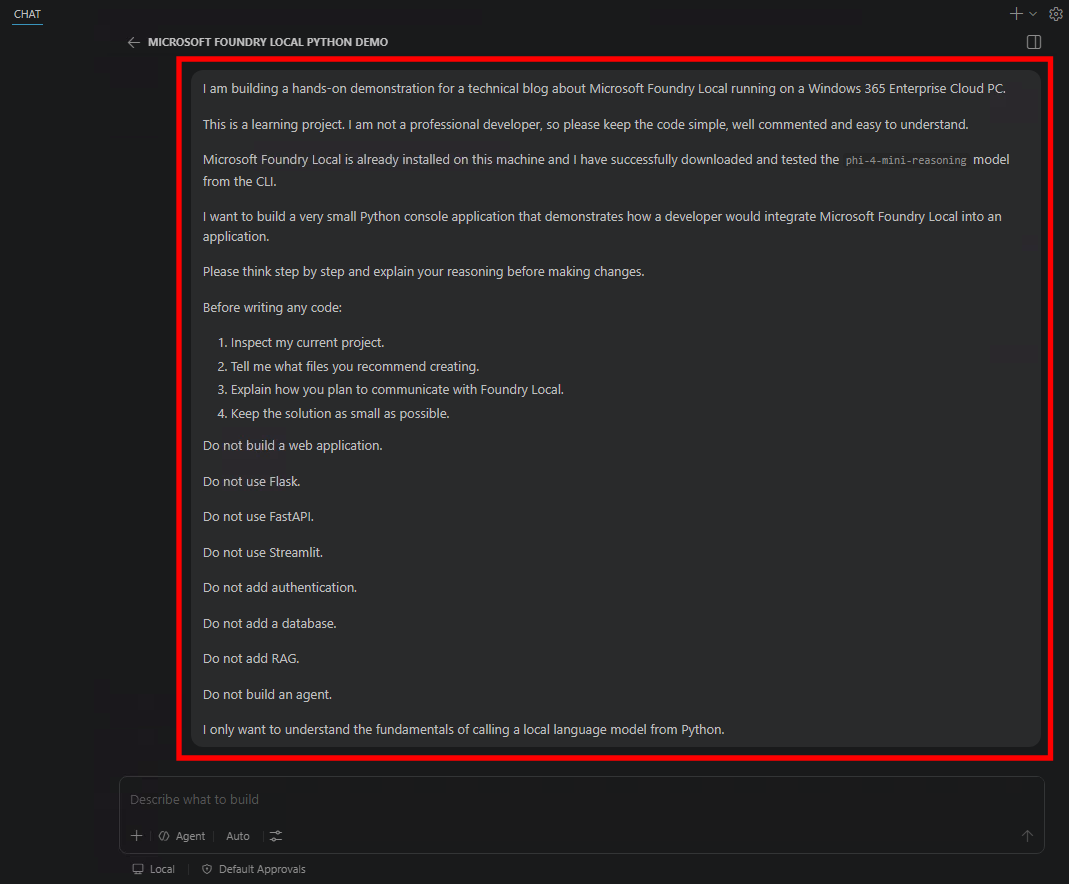
Setting clear requirements before any code was generated.
Copilot came back with a sensible approach for this first version: one small API function, a simple console loop and clear error handling. I approved the plan and asked it to start building, without adding any unnecessary complexity.
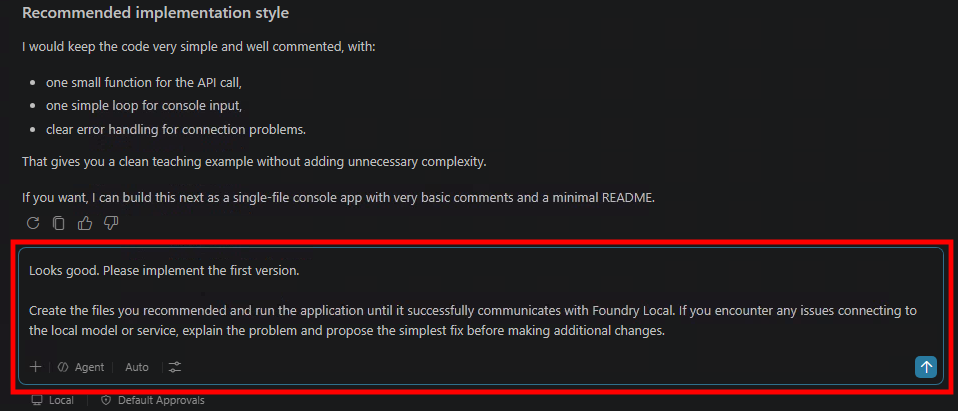
Reviewing Copilot’s proposed implementation before approving it.
Once the approach was agreed, Copilot generated the application and the commands needed to run it. The key point was that the app connected directly to the local Foundry endpoint and model, rather than simply wrapping the command-line experience.
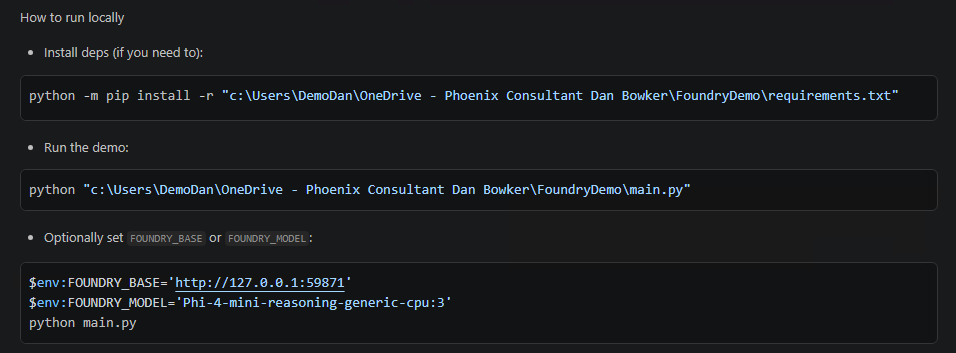
The generated application connecting to Foundry Local through its local API.
Evolving into a desktop application
Once the console version was working, I wanted to make the demo more approachable.
Using the same Foundry Local integration, I evolved the project into a lightweight Windows desktop application called Windows 365 AI Toolbox. The app includes a local AI chat feature, but the wider goal was to demonstrate practical scenarios that Windows administrators and endpoint engineers could relate to.
The first version includes three simple tools:
- Explain PowerShell to explain scripts, identify assumptions and suggest improvements.
- Summarise Text to extract key points and action items from technical documentation.
- Local AI Chat to demonstrate general interaction with a locally hosted language model.
The entire application communicates with the model running on the Cloud PC. No prompts are sent to Azure OpenAI or another hosted AI service during inference.
With the console integration working, I asked GitHub Copilot to turn it into a lightweight Windows desktop application. I explained what was already working, which technologies I wanted to reuse and what the first version needed to include, including PowerShell explanation, text summarisation and local AI chat.
The prompt below gave Copilot enough context to reuse the working Foundry Local integration without overcomplicating the application.
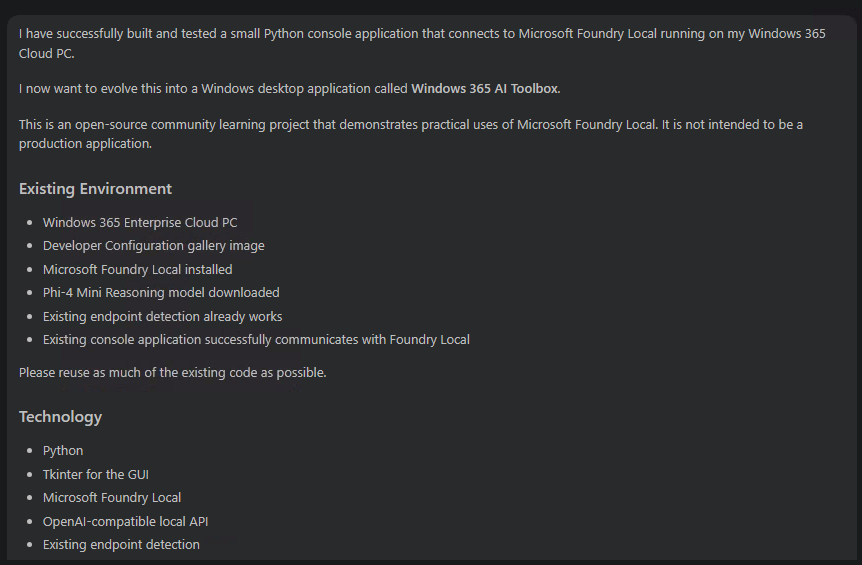
Extending the working console demo into a lightweight Windows interface.
With the files in place, the final step was simply to launch the application from the project folder. Running python app.py started the new desktop interface and brought the console prototype to life.
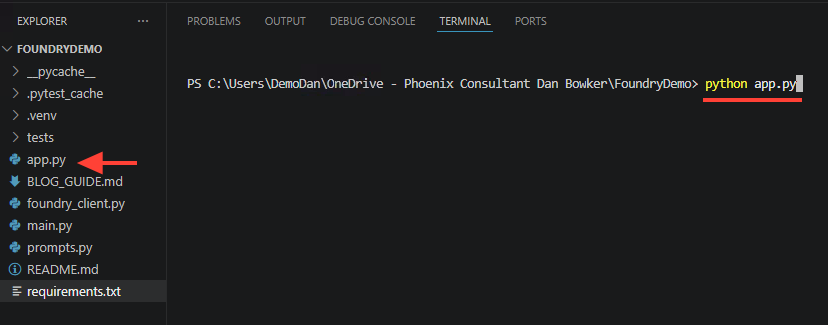
Launching Windows 365 AI Toolbox from the Visual Studio Code terminal.
And just like that, we had an app.
Windows 365 AI Toolbox was now running on the Cloud PC, connected to Microsoft Foundry Local and ready to send prompts to the locally hosted model.
✅ MILESTONE REACHED
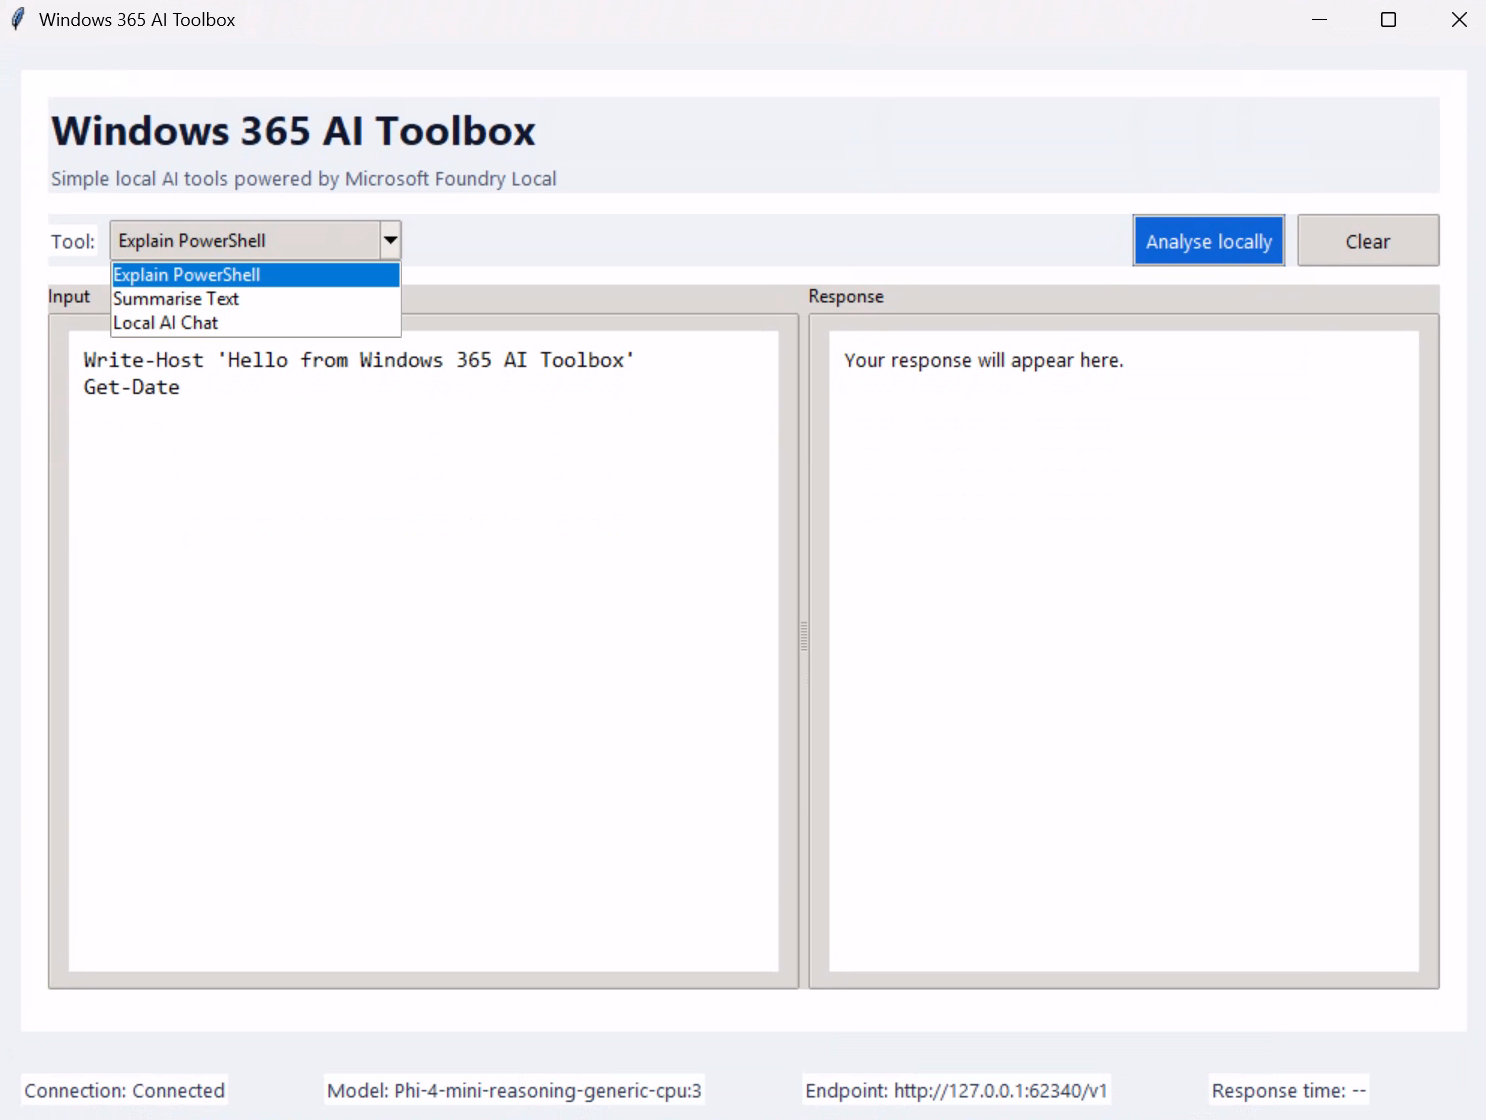
The first working version of Windows 365 AI Toolbox, connected to the locally hosted model.
With the interface running, I wanted to prove that the application could do more than simply connect to Foundry Local. I selected Explain PowerShell, pasted in a small script and asked the locally hosted model to explain what it did, identify assumptions and highlight potential improvements.
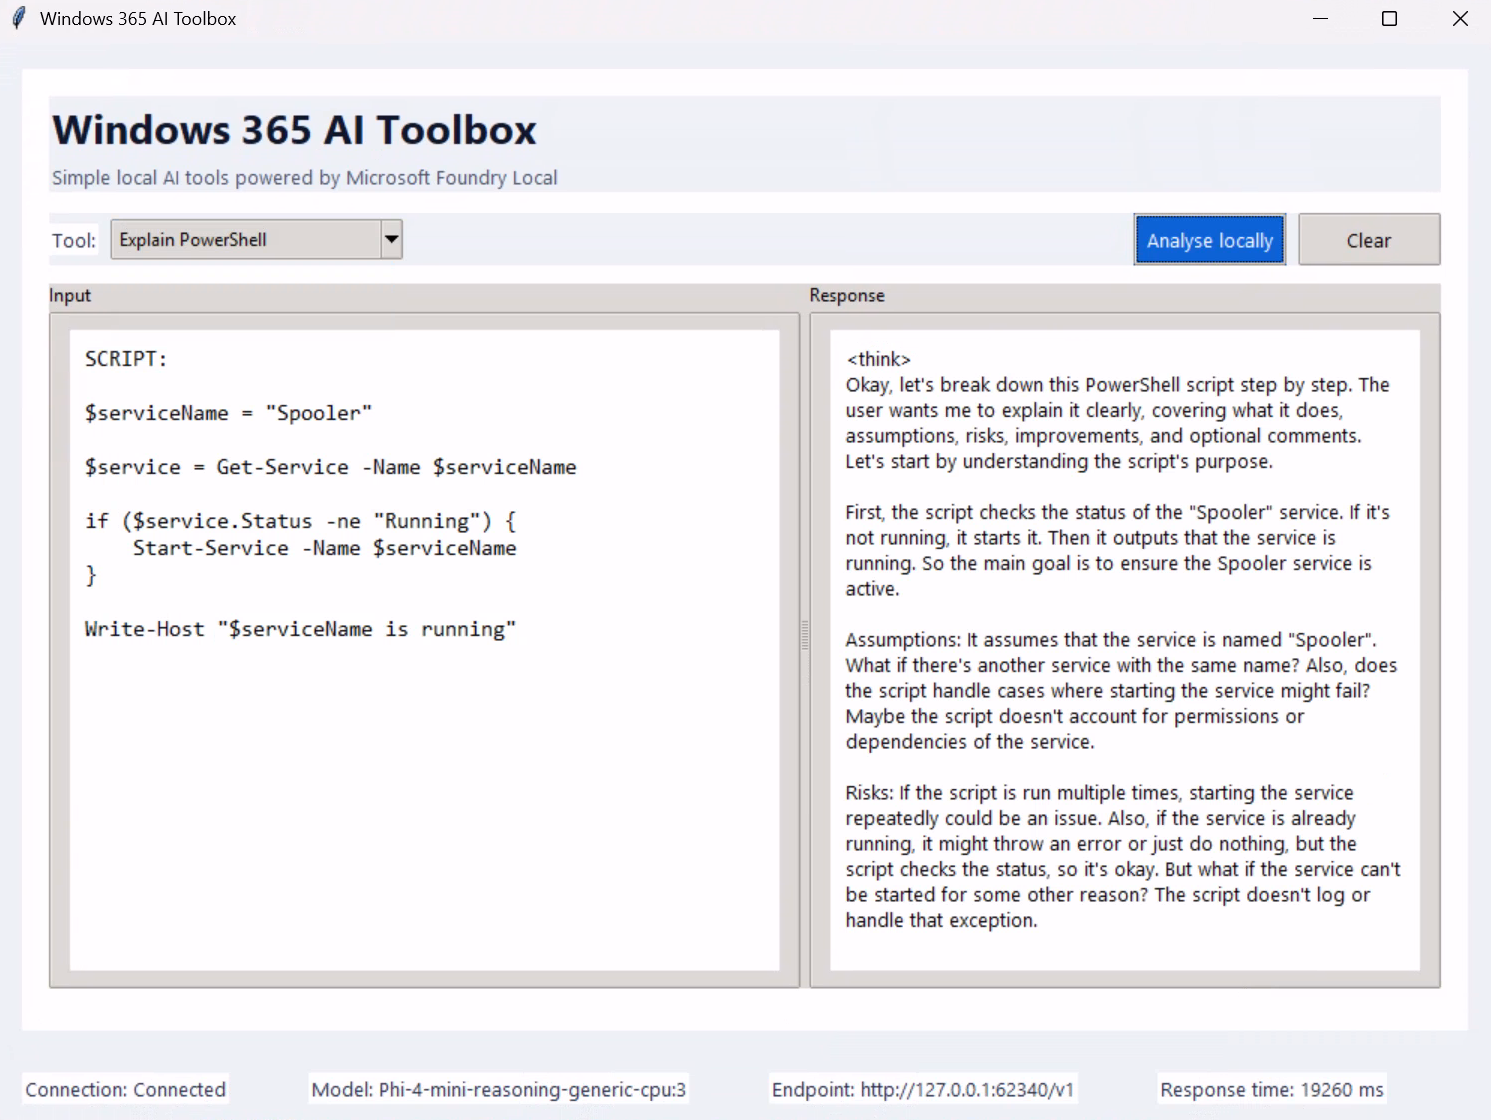
Testing the PowerShell assistant against the locally running Phi-4 Mini Reasoning model.
My first version used Phi-4 Mini Reasoning for every request. It successfully demonstrated that a compact reasoning model could run on a CPU-based Windows 365 Cloud PC, but it was not always the best fit for a user-facing application. Responses were slower, and the model often returned lengthy reasoning output before reaching its final answer.
Looking through the Foundry Local catalogue also highlighted how important model selection is. Different models are designed for different tasks, and not every model has a CPU-optimised variant suitable for the Cloud PC I was testing.
So I updated Windows 365 AI Toolbox to support model selection. Phi-4 Mini became the default for general explanations, summarisation and chat, while Phi-4 Mini Reasoning remained available for more structured analysis and comparison.
This made the application much more useful than simply running a single fixed model. I could now compare response quality, speed and behaviour across models while using the same application and Cloud PC configuration.
To make that change, I went back to GitHub Copilot in Agent mode and gave it the exact models available on the Cloud PC, along with clear instructions for how model selection should work. I asked it to keep Phi-4 Mini as the default, retain Phi-4 Mini Reasoning for comparison, and use the Foundry Local SDK to resolve and load the correct CPU-optimised model dynamically.
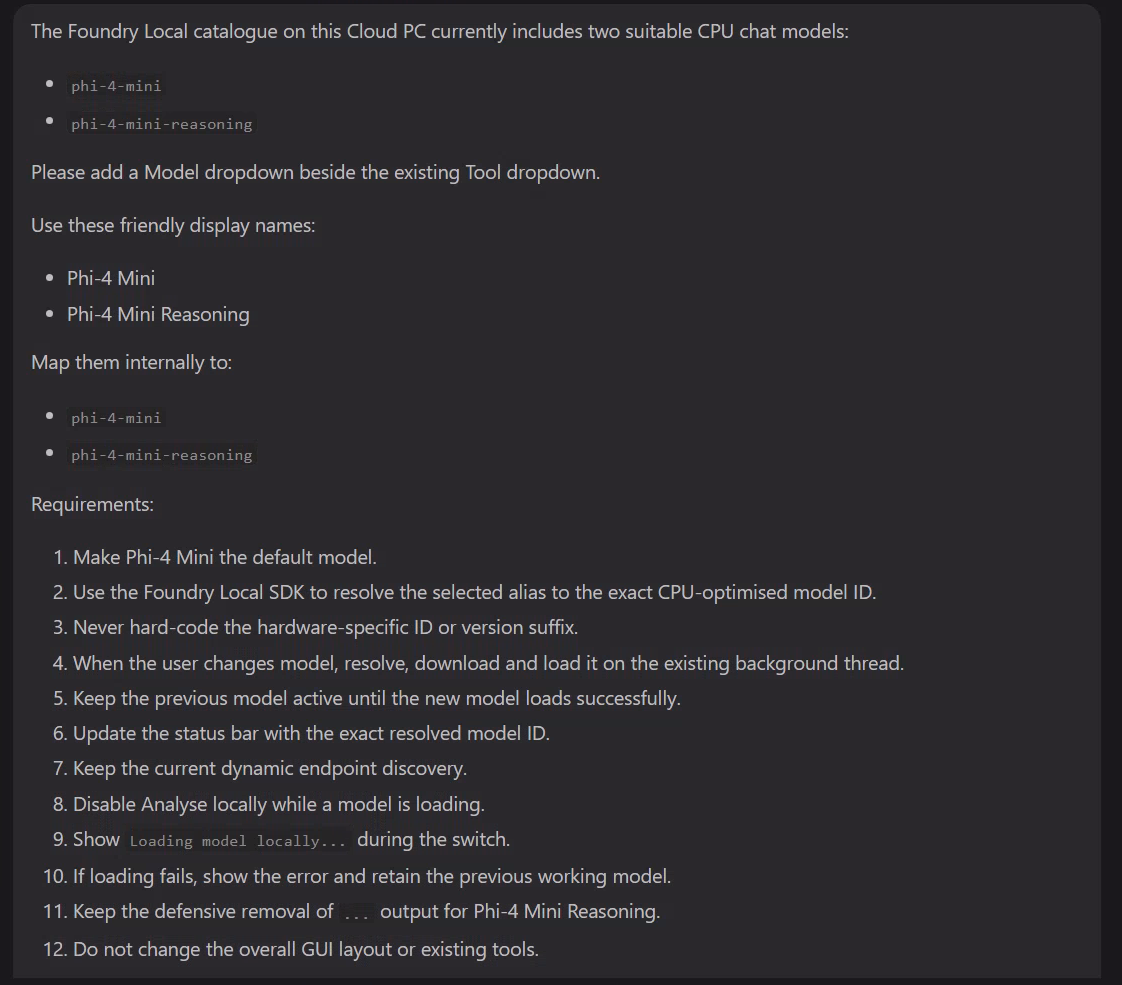
Defining the model-selection requirements for GitHub Copilot Agent.
With the model-selection logic in place, both CPU-supported models were now available directly within the application. The dropdown made it easy to switch between Phi-4 Mini and Phi-4 Mini Reasoning without changing any code or manually updating the endpoint.
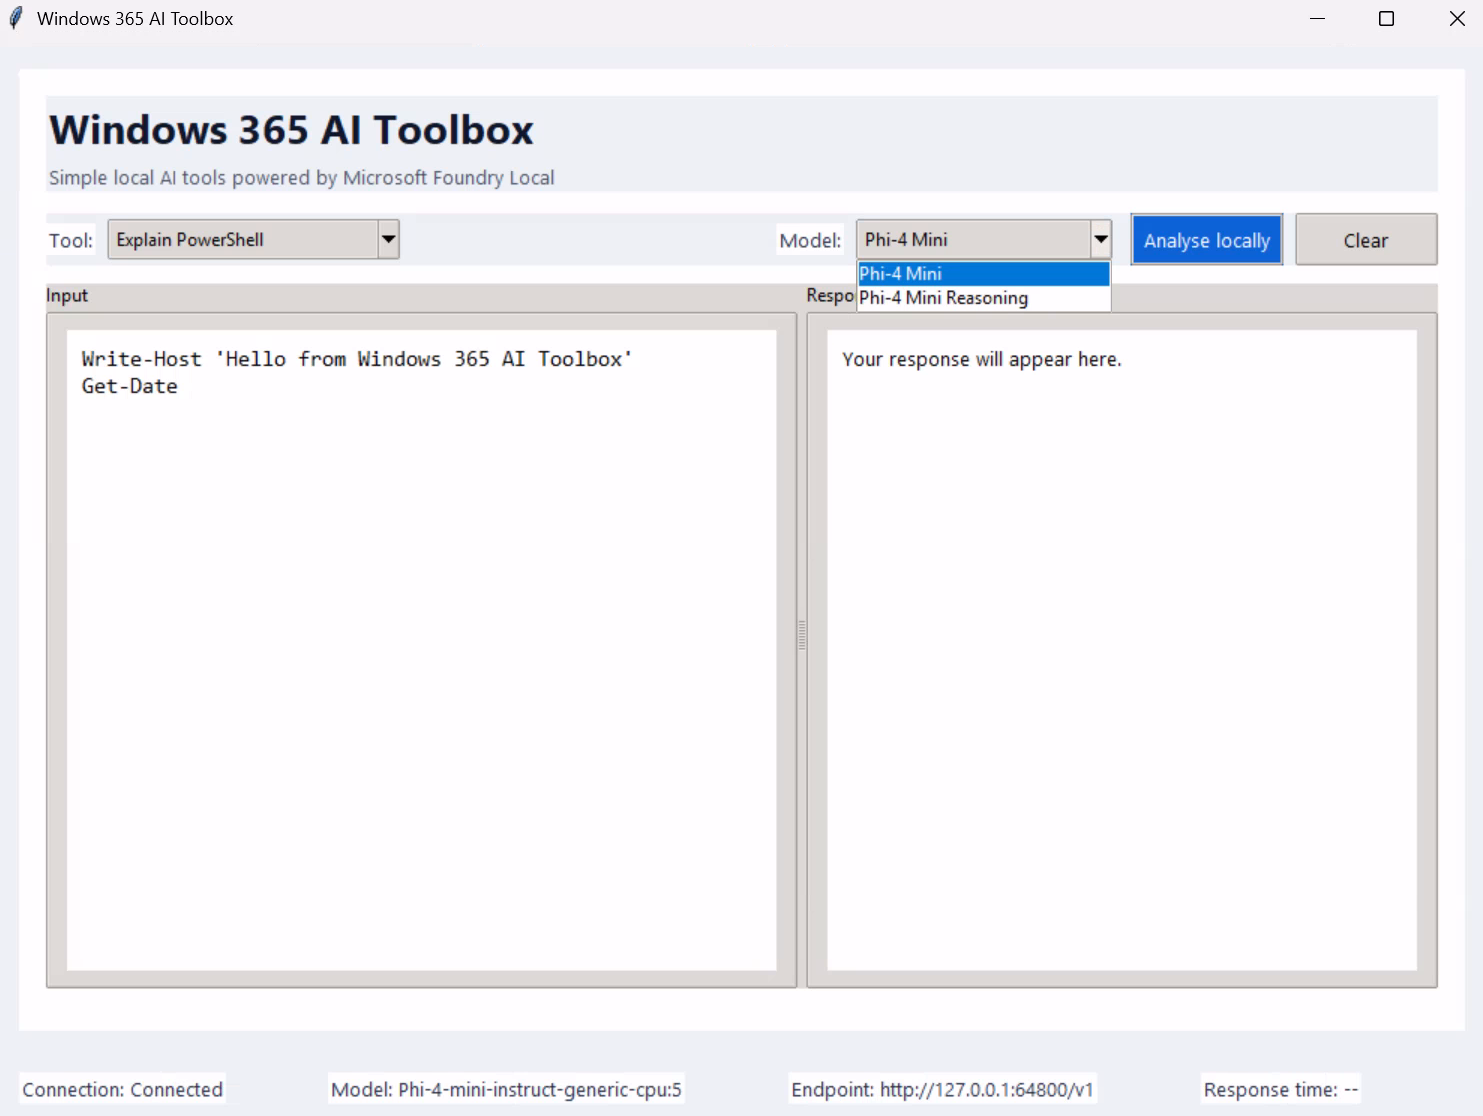
I reran the same PowerShell test using Phi-4 Mini. The response was noticeably cleaner and more direct, with none of the lengthy reasoning output that made the earlier result feel less suitable for a user-facing tool.
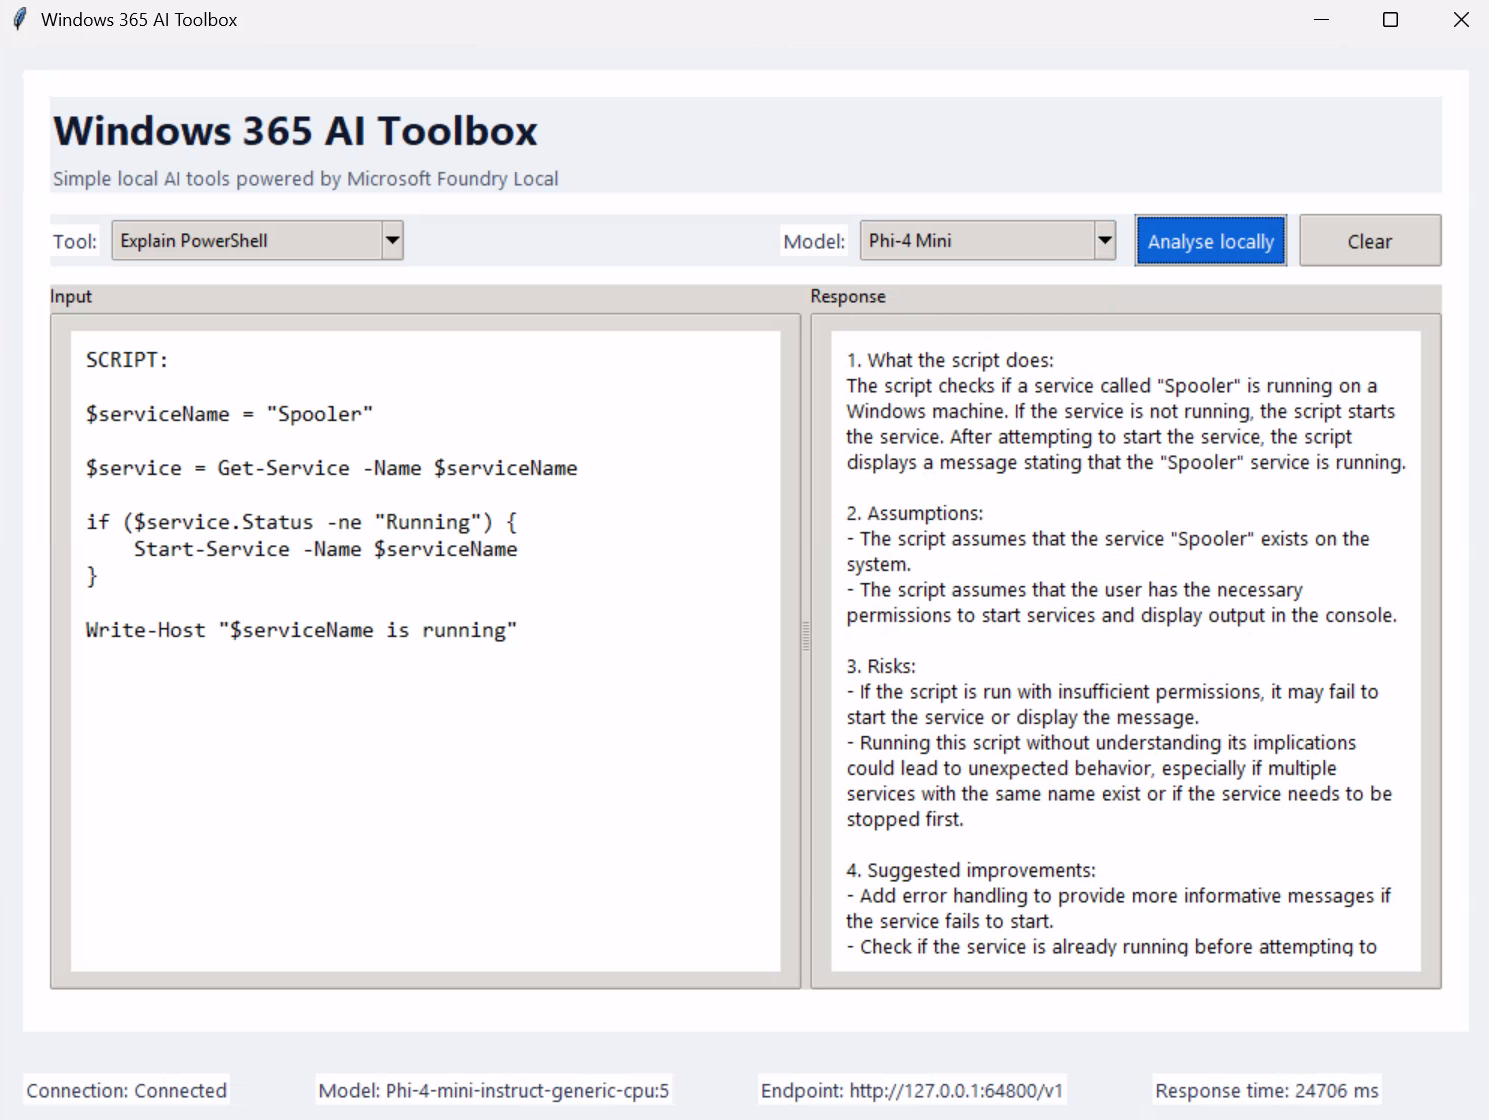
Switching to Phi-4 Mini produced a much cleaner response, while the new model selector made it easy to compare behaviour and performance.
My biggest takeaway
The most interesting part of this exercise was not that I could run a language model on a Windows 365 Cloud PC.
Microsoft had already told us that.
The interesting part was how quickly I could move from a freshly provisioned Cloud PC to building and testing AI-powered functionality.
The new Developer Configuration image removes much of the setup work.
Foundry Local provides a consistent local runtime.
Windows 365 provides a secure, isolated and repeatable development environment that I can provision whenever I need it.
Put those pieces together, and Windows 365 starts to look like a very capable AI development workstation in the cloud.
Where next?
I originally expected this to be a fairly simple hands-on test, but it has already given me two community projects that I want to take further.
The first is Windows 365 AI Toolbox, the lightweight desktop application I built during this blog. It currently demonstrates a few simple local AI scenarios, and I may continue expanding it with more practical Windows administration use cases. I'll make the project available soon.
Alongside that, I'm also building the Windows 365 AI Developer Kit, with a stronger focus on repeatable testing and benchmarking. The aim is to validate different Cloud PC configurations, test supported local models using consistent prompts, and capture useful results such as response time, CPU utilisation, memory usage and overall usability.
Rather than creating another synthetic benchmark, I want the project to help answer practical questions, including which models work best on CPU-based Cloud PCs, how much difference additional vCPU and memory make, and whether a particular configuration feels responsive enough for real development work.
As I test more models and Windows 365 configurations, I'll add the results and automation to the project.
If you're interested in following along, or even contributing ideas, you can find the project here: